FrictionHarmonics scanner & software system
Initial FrictionHarmonics system
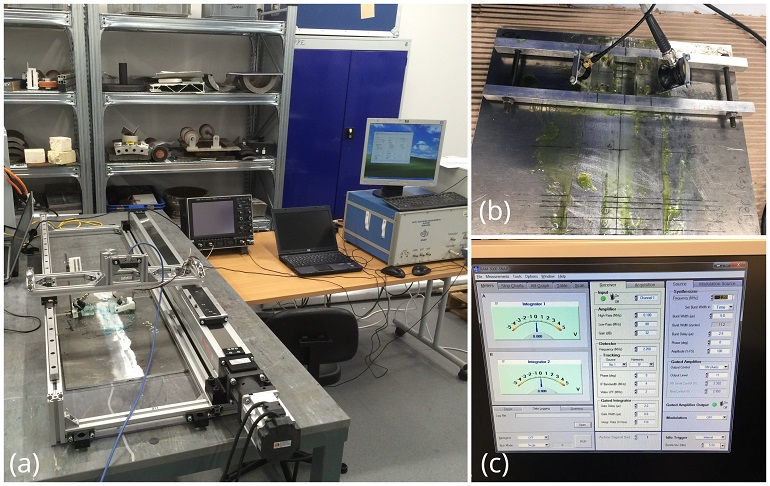
The initial FrictionHarmonics system was based on a commercial off-the-shelf linear scanner for flat plates only with a laboratory proof of concept setup of software and hardware.

FrictionHarmonics initial version: (a) FrictionHarmonics in action, (b) Close-up on scanner and probes, (c) Graphical User Interface
FrictionHarmonics system
The prototype version of the FrictionHarmonics system has been validated in TWI’s Friction Stir Welding facilities. The tests have been carried out on over 50 Friction Stir Welded flat plates. Specifically, FrictionHarmonics has been proven to detect kissing bonds of 0.6mm in height, which is below the critical size that has been shown to associate with crack generation (i.e. 0.67mm). These results were constant for Friction Stir Welded flat plates between depths of 6-8mm, the typical sizes used in the Aerospace. Figure 1 shows the prototype system in operation during these tests.
FrictionHarmonics scanner
The design of the original scanner was focused purely on inspection of flat surfaces. We have captured the most robust and innovative design solution in order for our system to handle more complex geometries and also adapt to the requirements of the operational environment. More precisely, the scanner configuration is flexible enough to carry out inspections on curved surfaces which are common in e.g. aerospace components, one of our main target segments.
The final system, as shown below:
- Can be manually handled by a single operator.
- Is designed in such a way so as to protect operators from accidents i.e. pinch,crush etc.
- Provides the tools to accurately and easily align the probes with the welding seam.
- Can be rigidly attached on concave and convex samples and follow their geometry due to a constant vertical force motor driven probe holder.
FrictionHarmonics software
The final software was designed based on the following features:
- User friendly GUI overhaul featuring an intuitive traffic light defect detection system
- Time domain plot
- Frequency domain plot
- Defect indication plot
- Offline analysis mode
- UT hardware controls
FrictionHarmonics system
The system is now CE marked and ready for market take-off. The FrictionHarmonics system will be marketed as "KiScan". The KiScan logo is shown below.

